Hot off Cloud Month, let’s look at how to deploy BIG-IP Virtual Edition on the Google CloudPlatform.
This is a simple single-NIC, single
IP deployment, which means that both management traffic and data traffic are
going through the same NIC and are accessible with the same IP address.
Before you can create this
deployment, you need a license from F5. You can also get a trial
license here. Also, we're using BIG-IP VE version 13.0.0 HF2 EHF3
for this example.
Alright, let’s get started.
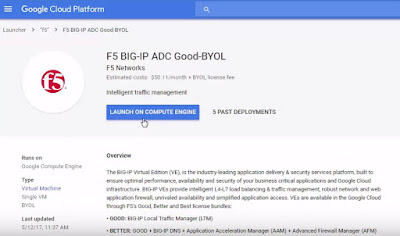
Open the console, go to Cloud
Launcher and search for F5.
Pick the version you want.
Now click Launch on Compute
Engine.
I’m going to change the name so the
VM is easier to find… For everything else, I’ll leave the defaults.
And then down under firewall, if
these ports aren’t already open on your network, you can open 22, which you
need so you can use SSH to connect to the instance, and 8443, so you can use
the BIG-IP Configuration utility—the web tool that you use to manage the
BIG-IP.
Now click Deploy. It takes
just a few minutes to deploy.
And Deployed.
When you’re done, you can connect
straight from the Google console. This screen cap shows SSH but if you use the
browser window, you need to change the Linux username to admin in order to
connect.
Once done, you'll get that command
line.
If you choose the gcloud command
line option and then run in the gcloud shell, you need to put admin@ in front
of the instance name in order to connect.
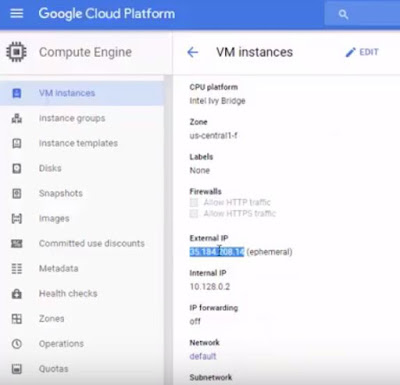
We like using putty so first we need
to go get the external IP address of the instance. So I look at the instance
and copy the external IP.
Then we go into Metadata > SSH
keys to confirm that the keys are there. (Added earlier), Whichever keys
you want to use to connect, you should put them here.
BIG-IP VE grabs these keys every
minute or so, so any of the non-expired keys in this list can access the
instance. If you remove keys from this list, they’ll be removed from BIG-IP and
will no longer have access. You do have the option to edit the VM instance and
block project-wide keys if you’d like.
Because my keys are already in this
list I can open Putty now, and then specify my keys in order to connect.
The reason that we're using ssh
to connect is that you need to set an admin password that’s used to connect to
the BIG-IP Config utility.
So I’m going to set the admin
password here… (and again, you can do these same steps, no matter how you
connect to the instance)
tmsh Command is: modify auth modify auth password adminAnd then: save sys config to save the change.
Now we can connect and log
in to the BIG-IP Config utility by using https, the external IP and port
8443. Now type admin and the password we just set.
Then we can proceed with
licensing and provisioning BIG-IP VE.
A few other notes:
- If you’re used to creating a self IP and VLAN, you
don’t need to do that. In this single NIC deployment, those things are
taken care of for you.
- If you want to start sending traffic, just set up your
pool and virtual server the way you normally would. Just make sure if your
app is using port 443, for example, that you add that firewall rule to
your network or your instance.
- And finally, you most likely want to make your external
IP address one that is static, and you can do that in the UI by choosing Networking,
then External IP addresses, then Type).
- If you need any help, here's the Google Cloud Platform/BIG-IP VE Setup Guide and/or
watch the full video.
ps


No comments:
Post a Comment