Recently we've been showing how to
deploy
BIG-IP (and F5
WAF) in various clouds like Azure
and AWS.
Today, we’ll take a look at how to
update an AWS auto-scaled BIG-IP VEweb application firewall (WAF) that was initially created by using this F5
github template. This solution implements auto-scaling of BIG-IP Virtual
Edition (VE) Web Application Firewall (WAF) systems in Amazon Web Services. The
BIG-IP VEs have the Local Traffic
Manager (LTM) and Application
Security Manager (ASM) modules enabled to provide advanced traffic
management and web application security functionality. As traffic increases or
decreases, the number of BIG-IP VE WAF instances automatically increases or
decreases accordingly.
Prerequisites:
- BIG-IP VE version 13.0.0
- You created your WAF using the F5 Cloud Formation Template or CFT from Github.
So, let’s assume you used the CFT to create a BIG-IP WAF in
front of your application servers…and your business is so successful that you
need to be able to process more traffic. You do not need to tear down your
deployment and start over – you can make changes to your current deployment
while the WAF is still running and protecting your environment.
For this article, a few examples of things you can change
include increasing the throughput limit. For instance, When you first configured
the WAF, you choose a specific throughput limit for BIG-IP. You can update
that. You may also have selected a smaller AWS instance size and now want to
choose a larger AWS instance type and add more CPU. Or, you may have set up
your auto-scaling group to launch a maximum of two instances and now you want
to be able to update the auto-scaling group attributes and add three.
This is all possible so let’s check it out.
The first thing we want to do is connect to one of the
BIG-IP VE instances and save the latest configuration. We open putty, login and
run the TMSH command (save /sys ucs /var/tmp/original.ucs) to save the UCS config
file.
Then we use WinSCP
to copy the UCS files to the desktop. You can use whatever application you like
and copy the file wherever you like as this is just a temporary location.
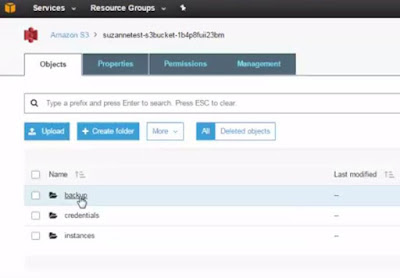
Once that’s done, open the AWS Management Console and go to
the S3 bucket. This bucket was created
when you first deployed the CFT and locate yours.
When you find your file, click it and then click the Backup folder.
Once there, now upload the UCS file into that folder.
The USC is now in the folder.
The last step is to redeploy the CFT and change the selected
options. From the main AWS Management Console, click CloudFormation, select your Stack and under Actions, click Update Stack.
Next, you can see the template we originally deployed and to
update, click Next.
Scroll down the page to Instance
Configuration to change the instance type size.
Right under that is Maximum Throughput to update the
throughput limit.
And a little further down under Auto Scaling Configuration
is where you can update the max number of instances. When done click Next at the bottom of the page.
It’ll ask you to review and confirm the changes. Click Update.
You can watch the progress and if your current BIG-IP VE
instance is actively processing traffic, it will remain active until the new instance
is ready. Give it a little time to
ensure the new instance is up and added to the auto scaling group before we
terminate the other instance.
When it is done, we’ll confirm a few things.
Go to the EC2
Dashboard and check the running instances. We can see the old instance is
terminated and the new instance is now available. You can also check the instance
size and within the auto scaling group you can see the new maximum for number
of instances.
You can follow this same workflow to update other attributes of your F5 WAF. This allows you to update your servers while continuing to process traffic.
Thanks to our TechPubs group, you can also watch the video demo.
ps
Related:


No comments:
Post a Comment